Will it work? Photomicrography Project

I used a third party Viltrox 23mm F/1.4 lens which was made for APS-C mirrorless Fuji X mount, to mount onto a Micro 4/3 Panasonic Lumix G95. For the time being, I had no ideal way of mounting the lens in reverse onto the camera, but I taped it to a set of extension tubes for as much magnification as I could possibly get. The Viltrox lens that was used is a high quality lens that initially cost me about $329; Part of the cost was due to the lens being capable of autofocus (AF). AF is something that I don’t need for this project; in fact, I likely shouldn’t be using an AF lens. As you can see from the image, the magnification was quite ample. Not only was there great magnification which could enable the camera to photograph an area about three millimeters by four millimeters across, but the image quality remained superb even though the lens isn’t mounted the “correct” way, and despite the extreme macro.

The high level of image quality is due to the lens being constructed of special lens elements that give it great sharpness, although there are prime lenses with about the same amount of focal length which are likely significantly greater with regard to optical resolution, and, such a lens which has been designed optically superior to the Viltrox, could be even greater and more capable when reversed. Keep in mind though, if you ever want the most magnification possible, you might want a slightly different lens; the Viltrox is a 23mm lens which has been designed to work optimally for APS-C mirrorless sensors. For Micro 4/3, the effective focal length is between 17mm and 18mm, when on the camera normally. I did some research about lenses to be able to find what lens configuration is best when reversed, to be able to get a maximum amount of magnification but without leading to an absurdly small working distance (minimum distance from the front lens element to subject); Ideally, it is best to use a lens which has been designated as about 10mm to 12mm for Micro 4/3 mount. Even without any extension tubes, such a wide-angle lens when mounted backwards onto a Micro 4/3 camera, is able to garner approximately 3X magnification! 10mm to 12mm is equivalent to a range of 20mm to 24mm for Full Frame.

I personally found it important to use such a wide focal length myself, although I don’t currently obtain such a lens; the reason being is that you can get a maximum amount of native magnification doing lens reversal this way; and something you might not be aware of, is that adding any extension tube to a lens can lead to some degradation of image quality if the lens’ isn’t optically built to a specific standard, mainly because the lens’ performance limit is therefore “stretched” by the use of extension. By starting out with greater native magnification, you don’t necessarily need to add as much extension to be able to achieve a given amount of magnification. Considering what I’ve tried before using a lens of my own mounted to extension tubes, you should be able to achieve a magnification of approximately 5X while maintaining a considerable amount of working distance; To achieve such a large magnification and be able to “zoom in” on things that could be extremely small to human vision but still be able to include lighting to the scene being photographed in a practical way, you can start by buying a 10mm or 12mm lens, and buying the appropriate Micro 4/3 reverse adapter/ring to see what the results are like after zero amount of extension. If the lens performance/optics hold up to the demands of your macro photography, then you may try increasing magnification by increasing the amount of extension in small increments. For example, try using a 10mm extension tube with the reversed lens, then add on a 16mm tube.

The more-or-less obvious aspect to consider is that if you want to practically maintain resolution or sharpness throughout the entire frame including the center throughout the midframe to the corners, you likely need to invest more money into the lens itself; the more expensive, the more quality. But, as I’ve already mentioned, AF isn’t something that should be included, so try looking for a lens that doesn’t have AF as it won’t work in reverse. What’s also important is that the lens doesn’t have optical image stabilization, as that isn’t useful to any extent when the lens is in reverse. What’s important for the lens characteristic to be inclusive though is that the lens be fully manual; look for a lens with fully manual aperture ring that can adjust aperture even when the lens isn’t mounted on a camera (important if the lens is in reverse).

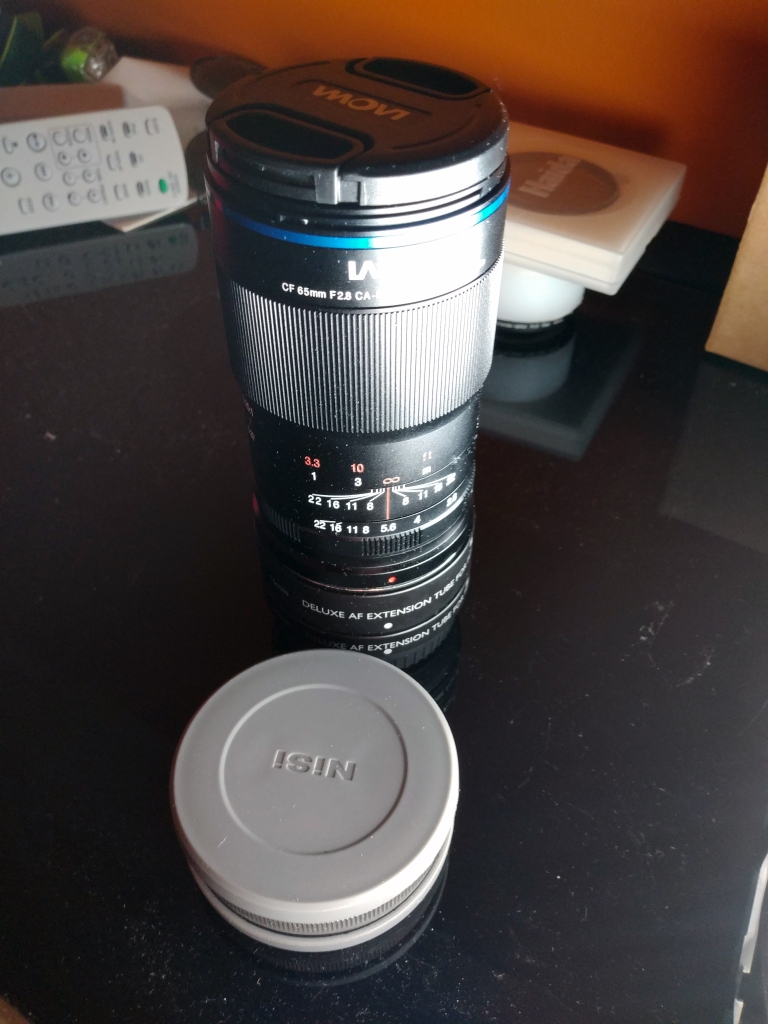
Unfortunately, although the Viltrox lens had a manual aperture ring, it had to be pre-set while mounted onto a camera, which is something that beforehand I had not considered. Reverse lens technique is almost certainly the most effective macro technique for achieving the most magnification while staying within a rather small budget; this is the main reason why I decided to go with a reversed lens! While I don’t have the necessary component as of now, to be able to proprietarily mount the lens in reverse, I could optionally buy about four cheap adapters which I could make into an assembly and be able to mount onto the T-mount telescope adapter that I had, which could be mounted on the extension tubes that I obtained, whereas the T-mount adapter can act as an additional amount of extension; I’m not one hundred percent decided as of now as to whether that’s what I want to do, but I could certainly use some advice if anyone has any. The set of four adapters could cost me approximately forty dollars altogether, so it’s not an extremely expensive investment of a project.

The Custom Macro Setup!

The new lens, the Laowa 65mm F/2.8 2X APO Macro. 26 to 27mm extension tubes (total). I can also use a 52mm-58mm step-up adapter for mounting the Nisi 10X diopter to the end. Pictured beside the lens is the Diopter, which is also an APO lens- akin to the optical build of a high-quality refractor telescope! The original maximum macro magnification of the Laowa lens is 2X, but with the setup, I can achieve about 3X! The distance at the ~3X magnification, between the front lens element and subject, is about on inch. I was afraid that with this setup, I might not be able to focus as the minimum distance between lens and subject might’ve needed to be literally zero. I simply needed to try it eventually, right? Sample photos may be shown, once I get a chance to photograph something interesting. However, I did try the configuration (Laowa lens with extension tubes and close-up diopter) at F/22; the sharpness in the center was quite great! Still not checking sharpness in the corners though, but that might change soon! This is the lens (the Laowa) that I was stoked about. It is indeed in “Like New” condition! It’s even smaller than the 7artisans 60mm F/2.8 1:1 macro lens, which I wrote before that doesn’t seem to produce life-size macro, at least without extension tubes.

So yeah, as I’ve mentioned before for this blog, I was trying various methods of achieving macro at and/or beyond 2X macro magnification. I was about convinced that I could’ve mounted the Nisi Close-up Diopter to the end of 7artisans 1X macro lens, but it eventually was proven to be impractical using methods available to me; I eventually ordered a specific-made adapter to be able to achieve which took about three weeks to be made, and cost about $30. I’ve started to feel quite awkward myself, knowing that someone made it for me. That I refused to buy it. but, this time I don’t know with too much certainty how to reply to the seller. I was afraid that I might get into some trouble with the fact. But there you see, my newest macro setup.

Neat New Lens for Sony; Initial Thoughts From A Fuji X User

There’s been a new lens announcement. It’s the Tamron 35-150mm F/2-2.8! I’m not a Sony ILC owner, but it seems like a truly fantastic lens. I’ve been really hoping that for the Fuji system, a Sigma ART lens could be made with such specifications! The aperture of F/2.8 of the Tamron is quite large of an aperture for 150mm of focal length! Such a lens can pass about as much light through it as a 50mm lens could at F/0.93 lens. F/0.9 isn’t the same as F/2.8 in terms of aperture, but in the example, it is accurate in regard to the exit pupil. This means that it could be a relatively great lens for lowlight photography! I’ve wanted to own a Sigma ART lens for some time, but never before had much of the chance to obtain one. Ideally, I’ve been thinking that Sigma could create a 35mm ART lens alongside (or separately from) a very bright aperture ART lens; such a set of lenses in particular could boost my photography creativity to a new level. Maybe an extremely bright 35mm ART could be enough? Probably not for my budget though.

My Way Towards A Handmade Lens?!

See this first image? It’s a 100% crop of something that looks unordinary at first, because it is that of a relatively unordinary subject-a GoPro battery. But what if you knew what it was taken with? It was taken using a 24 megapixel APS-C using a single lens element, much smaller than that of an SD Card! I got it- let’s just say it was extremely cheap! Even though it’s origin isn’t that of a smartphone, Next time your phone’s camera lens gets shattered, let me know!

Very Neat Methods For Macro!

Reversing a lens is relatively well known, and I probably would’ve been better off for achieving life-size and greater macro using such a method, rather than getting the 60mm lens- the 7Artisans 1:1. Even after 16mm of extension, I’m not convinced that the lens can produce life-size. It was indicated on the company page that the lens is capable of 3:1 with extensions, but that’s definitely not true after 26mm extension- at most, it’s 2:1. The main benefits of using such a lens, as opposed to a reverse lens technique, is that I can control aperture and for some situations, the focusing distance is large (that is, if compared to a reversed wide angle lens). The latter is not of much use to me, since I don’t photograph insects. My main objective for macro is to achieve an average magnification of about 2:1, but I’d like to have a range of 1:1 down to almost 3:1. Sometimes, a little less magnification is quite great, but for the most time, I don’t use that low magnification. Reversing a lens can easily achieve life-size macro, at least when the lens has a relatively large field of view- between about 18mm & ~50mm. There is an even more interesting method to achieve macro! That is either in the form of a wide-to-standard angle lens combined with a telephoto, or two standard lenses combined (it might even be possible using a standard with a wide angle). In such a scenario, the telephoto lens can be attached directly to the camera. Next, the reverse ring can be attached to the front end of the wide angle. Lastly, to attach the wide angle lens to the end of the telephoto, with the reversed side facing the camera, a special adapter might need to be required, known as a step-up/step-down ring. It might be possible to attach the lenses to each other without such a ring, if the two diameters are the same-admittedly, that’s something that I’m definitively sure about. I’ve not actually thought enough about it, but after trying it myself some time, it should become much easier for me to conclude anything regarding such a setup. I’ve read on a serious macro photography website that combining lenses in such a way can result in better rendition of an image as opposed to merely using reversing lens; it has something to do with the way that light passes through the multiple lens system, where the additional optics can correct the path of light in a better way. What this means is that vignette can be minimized and/or eliminated, but also the potential falloff of resolution in an image, which usually starts somewhere between the very center and outer limits- basically, from the center or mid frame to the edges. I’m not very sure if I should, with certainty, achieve this technique. I’m not sure if it’s necessary for me to use anything more than a single reverse lens, but attaching the reverse lens to the end of my telephoto zoom lens would most likely be intriguing. It’s not just the idea of getting better photos, or making macro photography easier for myself. It’s also the fact that merely seeing what the setup would work like would be intriguing! My zoom lens has a focal length of 50mm to 230mm, while my other lenses are 50mm & a 23mm. Given that the telephoto lens isn’t a prime lens, I can use that fact to my advantage, where adjusting the focal length can change the effective macro magnification! It is true that, ideally, the telephoto should be a prime lens- at least, regarding average ability of the lens to resolve fine details at every single aperture. The positive thing is that the telephoto lens that I’ve obtained can resolve details quite well! Therefore, it shouldn’t be very difficult to achieve a focused image with it using the reverse lens technique with it. I’ve tried it with a maximum total extension of 26mm, with which I’ve tested nearly all apertures. While I’ve forgotten what the photos at the smallest apertures came looking like, I remember that I was generally pleased. It’s been years since I started to do any macro even close to life-size in about 2015. I should’ve at least reversed a wide angle lens by then, which has made me wonder if, by not doing the reverse lens technique, if I missed out on much. Instead of using the 50-230 lens, I might instead use my 50mm prime (with the 23mm reversed), which has a much larger maximum aperture. The downside of such an approach is that I’d be limited to only single magnification, about 2.6 to 1. The 50-230mm lens along with the 23 could get me from 2.6X all of the way to about 10X! Would the aperture be adjustable for any of these setups though? What exactly would the aperture be (would it be that of the primary, or that of the secondary lens?), and would the apertures somehow create complexity in determining whether or not there’d be some kind of intermediate aperture?! Would the aperture for both lenses need to be the same?! Lastly, what would happen if the two lenses combined were added to the extension tubes?! Maybe I simply might need to do the simpler method first. That is, to reverse a lens to extension tubes. I could go on from there, but then the additional question remains, which exact lens should I use- and should I just try one of them or all? experience of towards

My Dream Lens

I have long thought about a lens that could satisfy all of my photographic needs. 10mm to 100mm Lens with 1:1 macro possible at all focal lengths, no smaller than F/1 aperture at the telephoto end, even quicker aperture at the wide end (if possible), weather resistant, lightweight, and compact. While there have been at least a few very intriguing lenses, such as the Laowa 100mm 2X, none of them have come close to being my dream lens.

Rokinon 50mm F/1.2 Lens With Extension Tubes

I tried to mount 26mm of total extension to a Rokinon 50mm F/1.2 lens for my Fuji X-T2. I was pleasantly surprised by the magnification increase that I was able to achieve! On average, I was able to get moderately sharp images using the setup, with a minimum magnification of about 1:3.2 and a maximum magnification of about 1:2. It’s still not at least 1:1 like I was hoping for, but at least I’ve tried the method and now have more knowledge. I can still get some compelling imagery using such a setup! Reversal ring next time, maybe? How practical will a reverse lens technique be with the Viltrox 23mm F/1.4 lens? I have asked some on the online community, although I have also considered getting a macro lens for my phone, which can handle weather better than my camera setup (macro lenses are usually [maybe even always] not weather resistant for Fuji. But for a smartphone, the setup is much less of a risk). On a separate note, I have wanted to own a Samsung camera such as the NX1; beautiful design with weather resistance and great resolution. Why did Samsung have to leave the camera industry?!- I included that because I wanted to share thoughts.

Clouds In Front Of The Moon

The clouds can look pretty much nothing short of spectacular, especially when they’re illuminated by the moon at night, and even more so if they take on specific forms and organize in specific types of ways near the moon. Let us take a look at this composite, of the Waning Gibbous, which is literally a daunting task to photograph in a single exposure- not to mention that it might not even be possible using modern technology:

composite
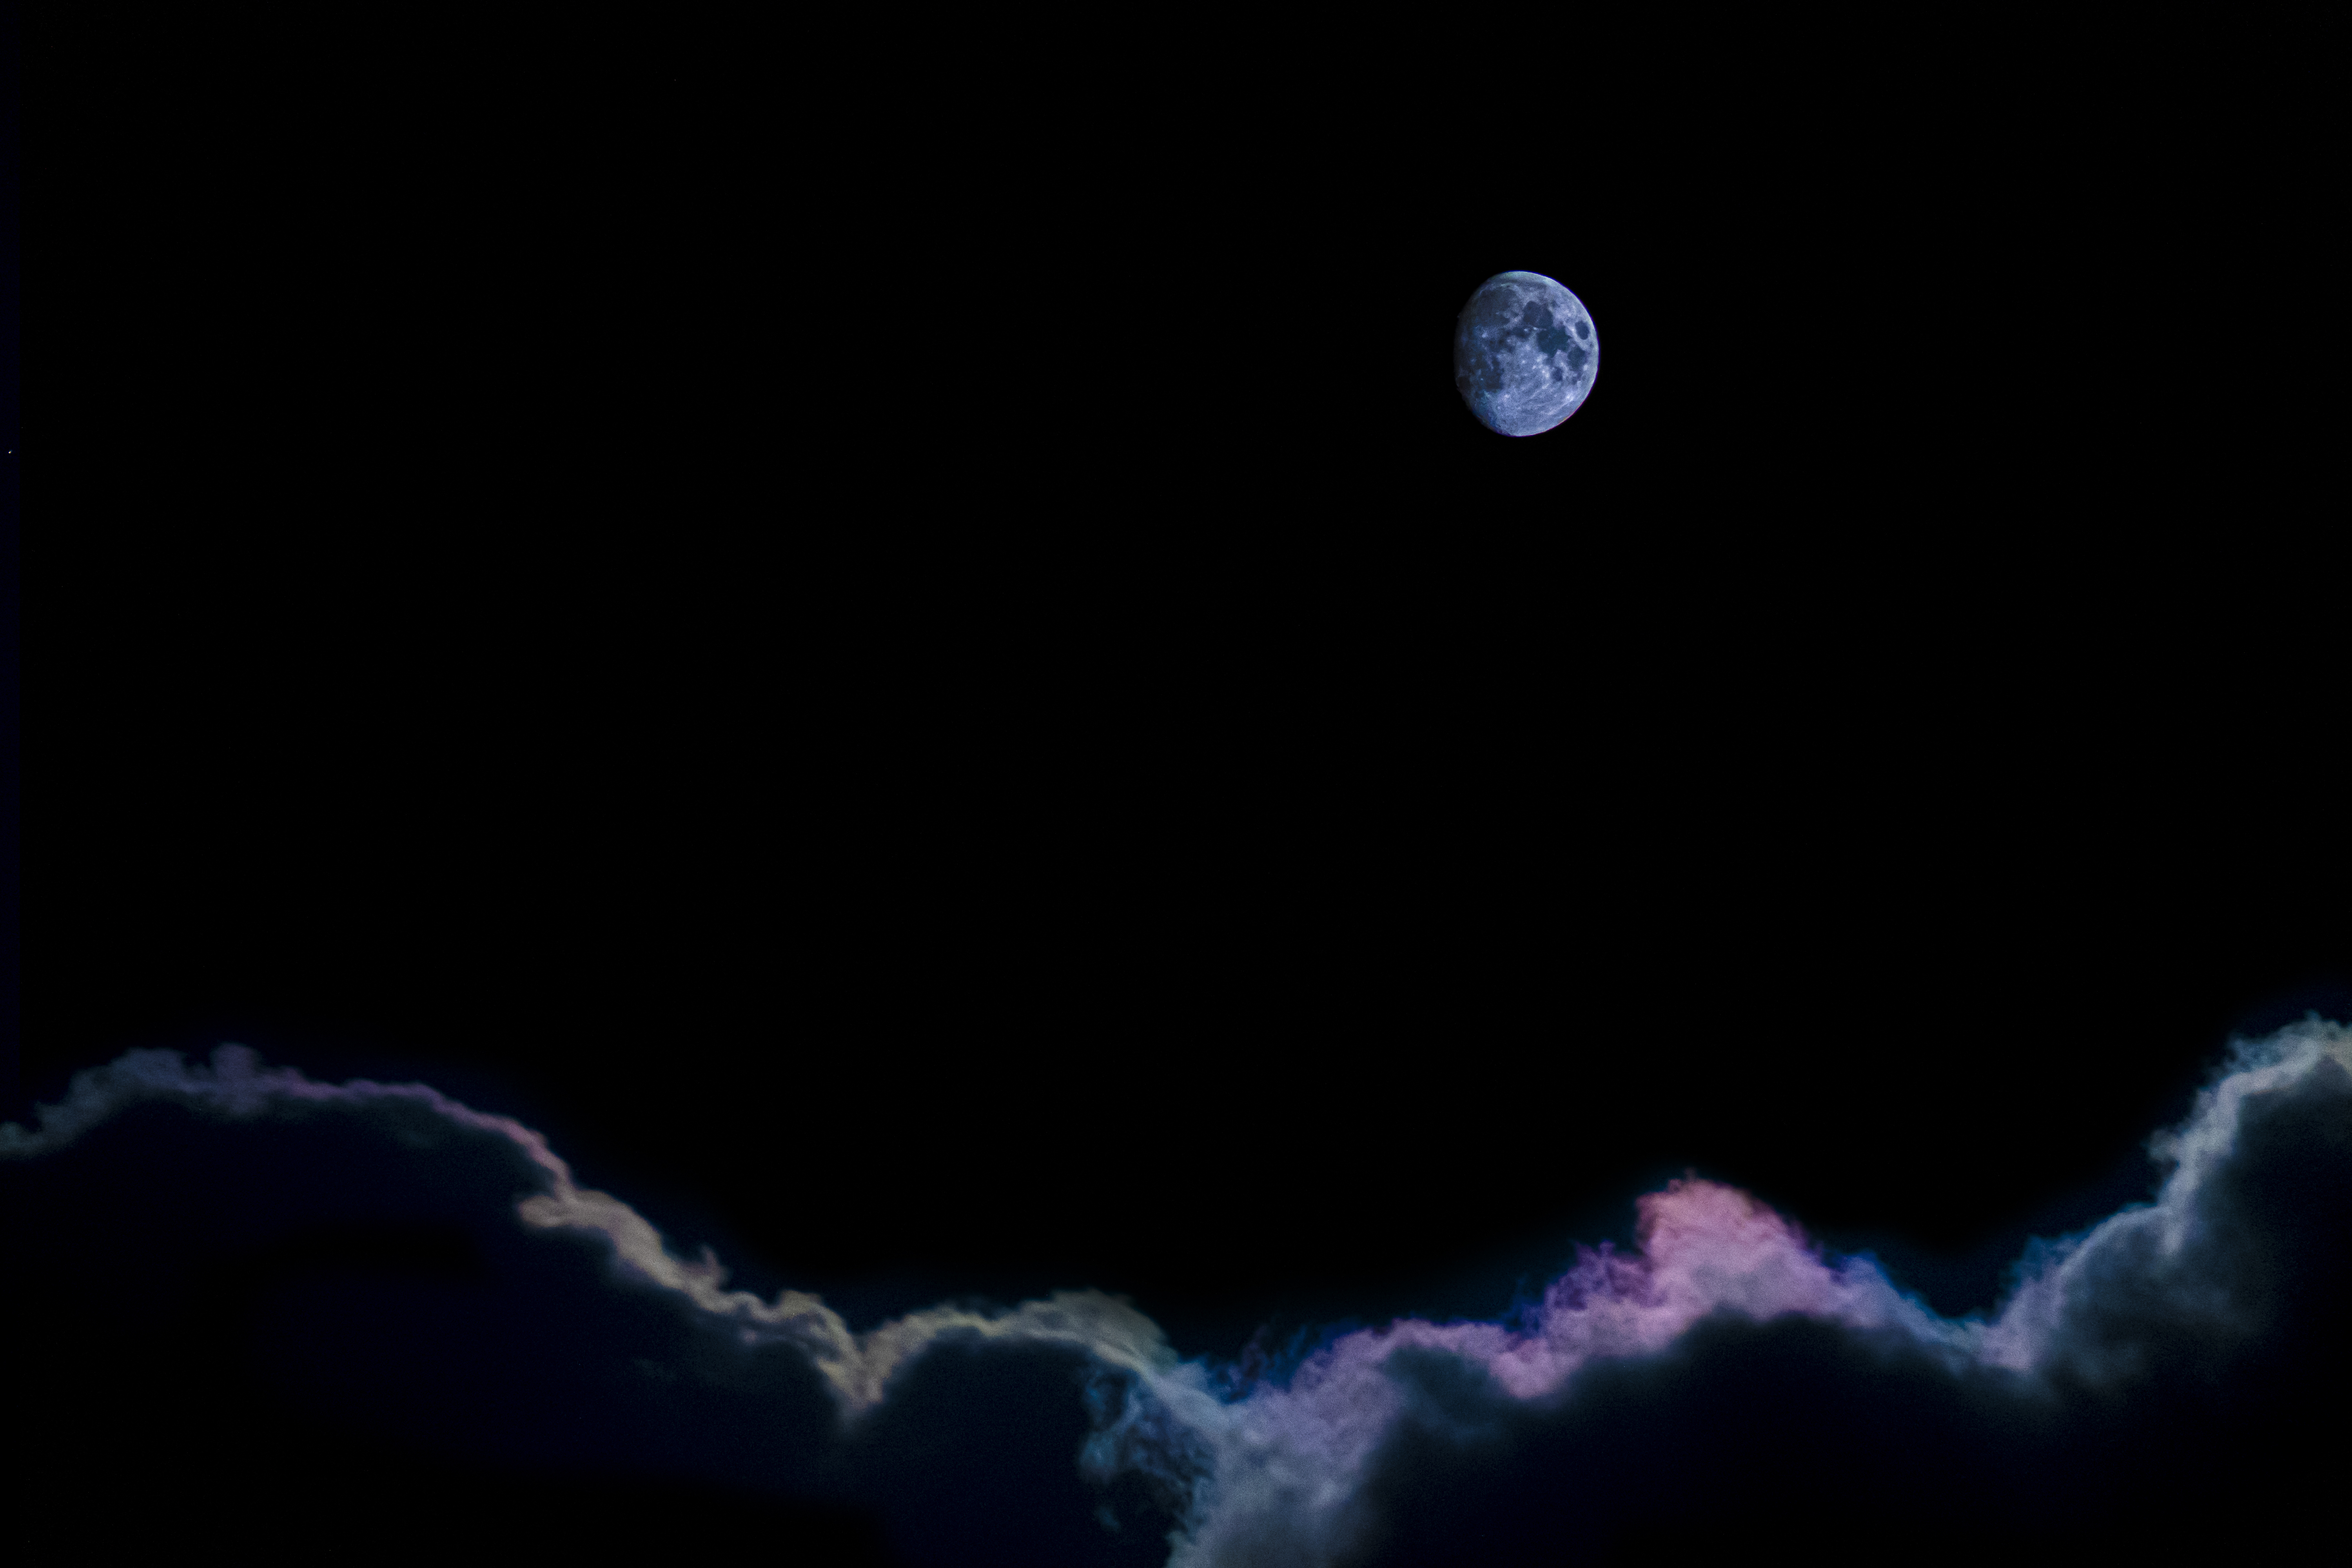
At one moment during the process of manipulation/post processing of the two photos in Photoshop, one being greatly underexposed while the other being greatly underexposed, I started to begin seeing a far more dramatic and aesthetic-looking composite start to take place, but unfortunately, I didn’t get far enough soon after that moment to make the composite look great without major flaws caused by using the brush tool during masking. I have wondered, is it even theoretically possible, to make such a photo using a single photo?! What came to mind while exploring in my mind such a dilemma, is how enormous the sensor might need to be to encapsulate the entire dynamic range required to bring to life enough details in both the astronomical sky as well as the meteorological foreground (clouds); made difficult by the mere fact that at the focal length of 162mm, which is the focal length at which the photo was taken, the clouds moved by extremely fast. Why have I chosen 162mm, if the lens can go to 230mm? Despite the fact that the lunar detail is much less visible at 162mm, there’s a wide field of view and in a sense much more room especially for much of the clouds’ structure to be visible. Some much more dramatic cloud forms might begin in the short future- perhaps?

Finally, the next photography post!

Let’s discuss in the comments, the upcoming pre-order status of the first choice of wide angle/standard Fuji X/Sony E mount mirrorless APS-C ILC lens. The article is to some extent outdated, but that’s at least partially because I missed it: the photography rumors website, Photorumors.com has released information about the first lens by Viltrox, the 33mm F/1.4, to be available for pre-order on April 15th, 2020. First Newest Viltrox Lens for Sony/Fuji Mirrorless. As an existing Fuji X-T2 owner, It’s personally exciting, here’s why: The 23mm lens is likely to be released soon, which means a relatively affordable but great value lens for landscape photos. The 33mm can also be considered great (or at least quite decent) for landscapes well as general photography. I also have considered getting a relatively wide angle lens because it could allow me to use an alternative method for achieving macro, specifically up to about 2:1 macro ratio, by using extension tubes.

Now, let’s see what the 23mm and the 33mm version can offer for such macro ability. The 23mm if compared to the 33mm lens, if attached to the same amount of extension, can very likely, if not certainly, achieve significantly more magnification. The primary downside, of course, is that the focusing distance and working distance is less. A small focusing distance might have some type of benefit, but in my own experience, I’ve found that a smaller vs larger focusing distance can make for serious problems, such as inability to focus far enough away to capture the furthest details in a scene-mainly having to do with bracketing for focus stacking. The worst problem with very small focusing distance, or rather, this time working distance, is that the light source might need to be incredibly close to a subject which can make lighting literally almost impossible unless the lighting comes from beneath, in which case the subject can’t be opaque. It might be very interesting to combine extension tubes with a reverse lens ring though. As I might’ve written before, the Viltrox lenses-all of them- are supposed to support Autofocus (AF), which means that I could finally make use of my X-T2’s focus bracketing function for macro, whereas otherwise I’d likely only use it for landscapes, but rather very rarely (partially because of minor problems that could become major for a multiple image stack, such as moving elements [water, foliage, etc.] that can prove to be incredibly complex even for the most advanced image processing algorithms). As a member of the Extreme Macro Facebook Group, I’ve seen astounding examples of what can be achieved going beyond 2:1 macro.

Electronic shutter, Macro

Admittedly, sometimes, when in the realm of beyond 2:1, the amount of images required can significantly “drain” the camera’s sensor, or specifically, the number/amount of shutter actuations that are still possible until the camera can start to malfunction; with an electronic shutter, the number of photos possible can be far more; think about each photo being effectively like a frame of video; modern SLRs and Mirroless ILCs are capable of recording for many hours at thirty frames per second, so the amount of times that the sensor can scan is likely millions of times.

Brenizer Macro

I had tried to post this photo on Instagram, it’s an attempt using Photoshop CC 2020 to achieve the Brenizer Method at relatively close focusing distance, about fifty inches. It worked well! It might have worked better using a different lens from farther away, maybe. I thought about selecting the red and green colors, desaturating the rest, and making the yellow in the flower be visible; I might still want to perfect that technique. Equipment Used: Fuji XT2, Mitakon 50mm F/1.2 at F/1.2, ISO 200, Diffuser

DSCF1089-Pano
Imagine using this method along with time lapse, for example!